Start Scrapbooking with a New Baby Scrapbook!
The birth of a child is a great motivator to start a new baby scrapbook - what better way to show off your new bundle of joy, or new grandchild! Of course, the prospect of scrapbooking can be daunting…to someone looking for the outside in. What size scrapbook to use? What kind of adhesive should I use?...and probably one of the hardest of all… How do I arrange all my pictures (in other words…how do I make a layout)?
In my opinion, it’s best to keep it simple in the beginning. You learned to crawl before you walked and perfected walking before starting to run (or at least most of us did), so there is no harm in starting out small and with simple layouts. I love the 8” x 8” format (or its close relative the 8.5” x 8.5”) because it forces you to focus on the pictures. A two-page layout gives you just enough space for four to five pictures (depending on size) plus some journaling and embellishment. Not so little space that you can’t experiment, but not so much space that you have lots of empty spots. So, let’s take a little journey together and build a new baby scrapbook.
Rule #1 – There is NO such thing as a bad layout. These are your memories and you have your own personal style. Some scrapbookers like lots of pictures, some like lots of embellishments and others like to write (journal) a lot. The key is to do what makes you feel most comfortable.
Rule #2 – Experiment! Experiment! Experiment! This is a reinforcement of Rule #1. In this article, I’m going to be providing you with some scrapbook layout sketches to work from, but do not feel that you “have” to follow them exactly. I’ve given you ideas based on what I like, but it’s your scrapbook, my ideas are simply launch points.
Rule #3 – Have fun! These are your memories and you’re preserving them for future generations to enjoy.
OK – A basic scrapbook album is going to come pre-loaded with 10 page protectors, which means you need to make 20 scrapbook pages. “Yikes!”, you scream…no, it’s really not that difficult. Let’s take it one step at a time.
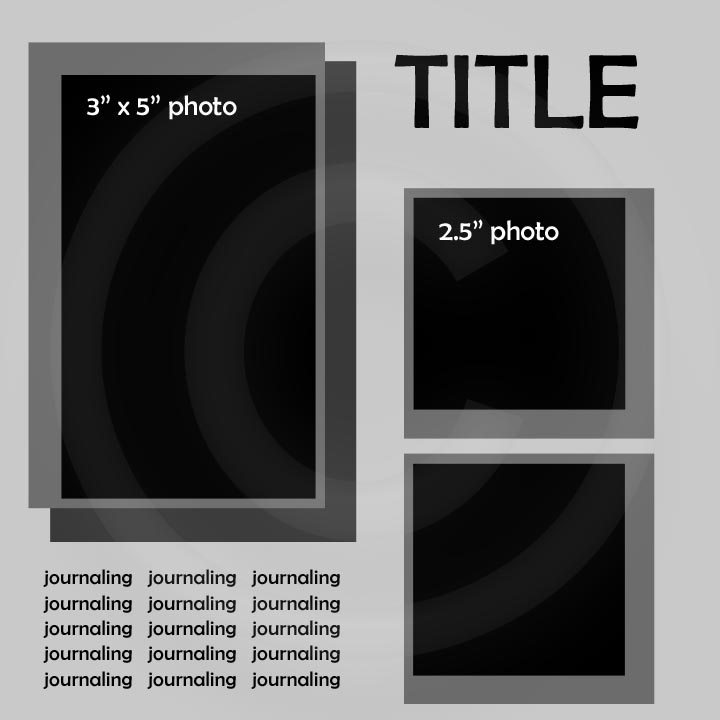
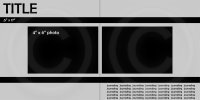
Page 1 – This is going to be your welcome page and, score, it’s only one page…we haven’t ventured into two-page layout land  yet! This page and the last page will likely be your easiest ones. My recommendation is to pick your favorite two to three pictures of your little one. If you want to use just one picture on the welcome page, that’s your personal preference. My example below uses three, but there are lots of ways to make a single photo layout pop. You can also choose to make this a photo only page or include your little one's vitals (birth date, weight/length and time of birth).
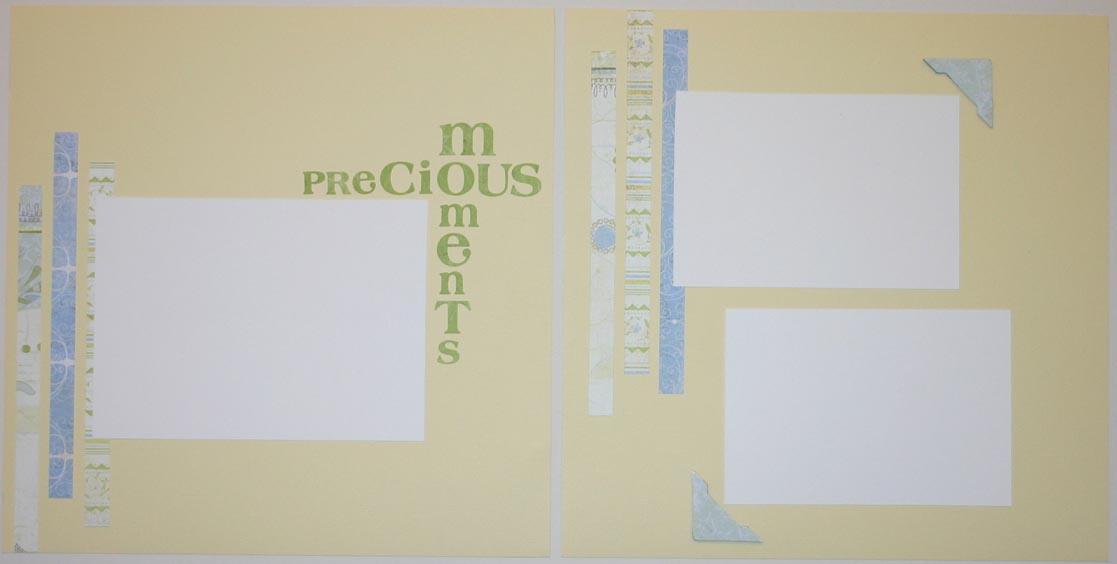
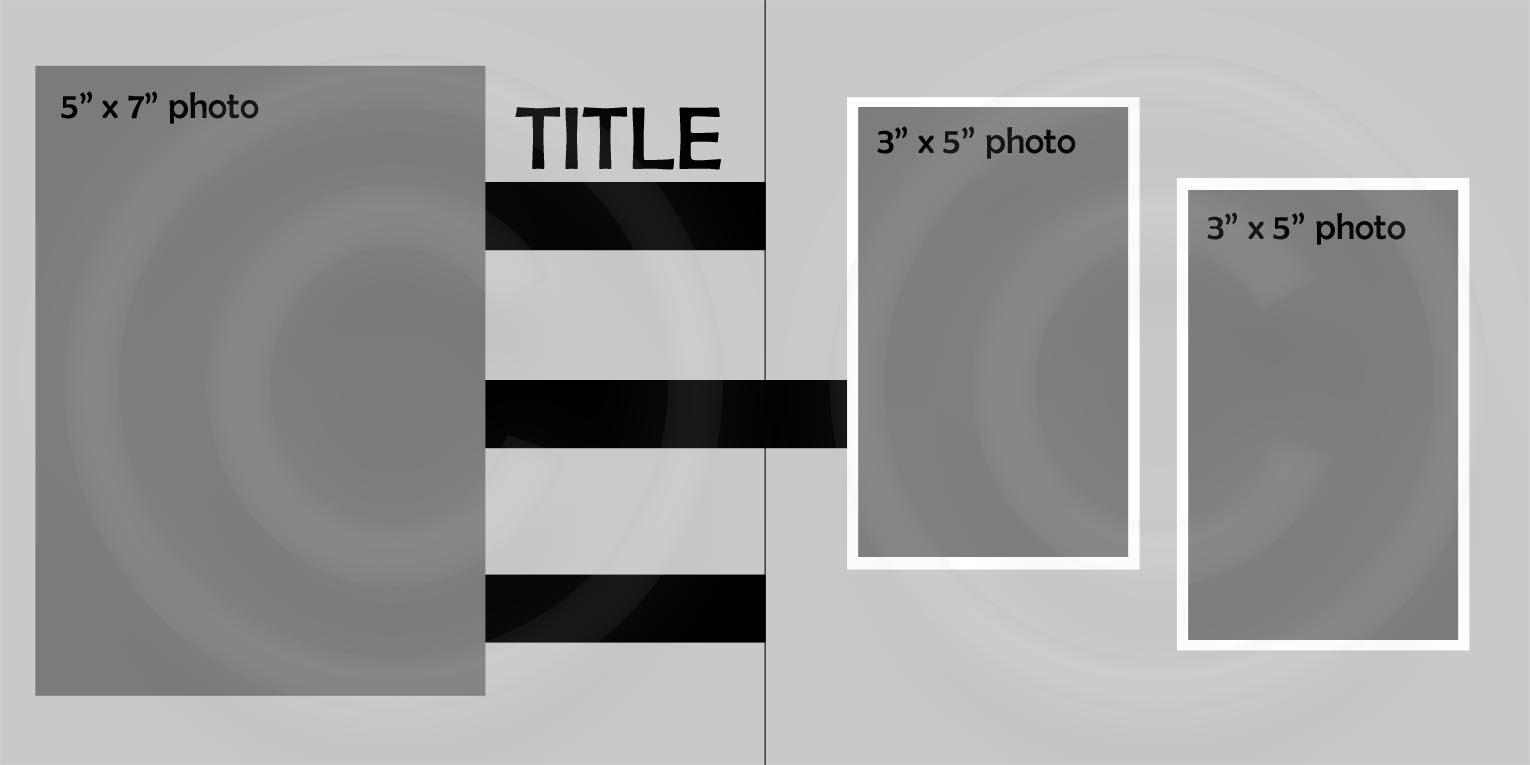
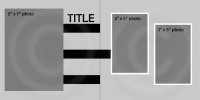
 Pages 2 and 3 – Precious “Mom”ents… You can’t have a new baby scrapbook without a layout featuring Mom. In this example, the two-page layout calls for three average size pictures (4” x 6” and 3” x 5”), but you have the room to turn your focal picture into a 5” x 7” or change the two 3” x 5” pictures into four 3” x 3” pictures. Remember, this is YOUR new baby scrapbook and you can design it however you choose. This layout is a great opportunity for a multi-generational photo of you, with your new baby, your Mom and your Grandmother (all Moms)!!
  You could even turn one of the 3” x 5” photo spaces into a journaling mat if you had a cool story to go along with the pictures. The title I chose for this layout is “Precious Moments” because it allowed me to frame the focal picture with the title AND it included the word Mom in it. Now, this example doesn’t make “M-O-M” stand out much more than the other letters, but if I had to do it again, then I’d use cardstock letters to really make those three letters pop! Of course, you can use whatever title comes to you and best describes your photos. Lastly, I’ve used oversized photo corners to frame two smaller pictures, but you can get creative and use eyelets, brads or small buttons. Have fun experimenting!!
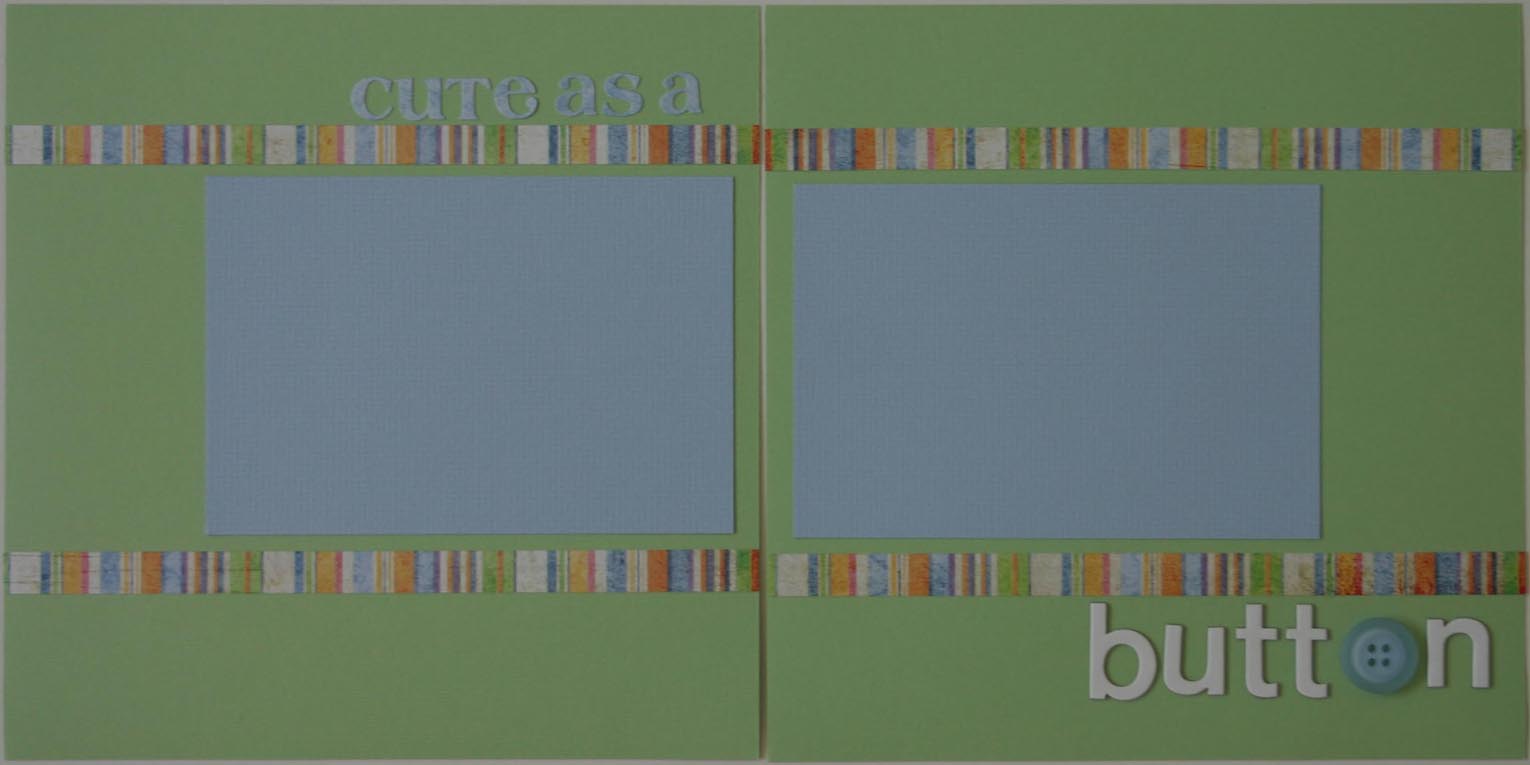
 Pages 4 and 5 – When you’re done with these two pages, you will have already completed one quarter of your new baby scrapbook. Great job – keep it up!! So, how many of you loved to collect stickers as you were younger? Or maybe you just love to accessorize?... Then you will probably love to embellish your scrapbook pages too, but what is a scrapbook embellishment?
  It can be just about anything you can use to “dress up” your pictures, but typically it’s ribbon, eyelets, brads, buttons, chipboard, paper clips, stickers, jewels (do you remember bedazzlers?...), etc. The extent to which you use embellishments is strictly a personal preference - some scrapbookers love to use lots of embellishments and only a few pictures and others only add a few. In this layout, an embellishment is incorporated into the title!
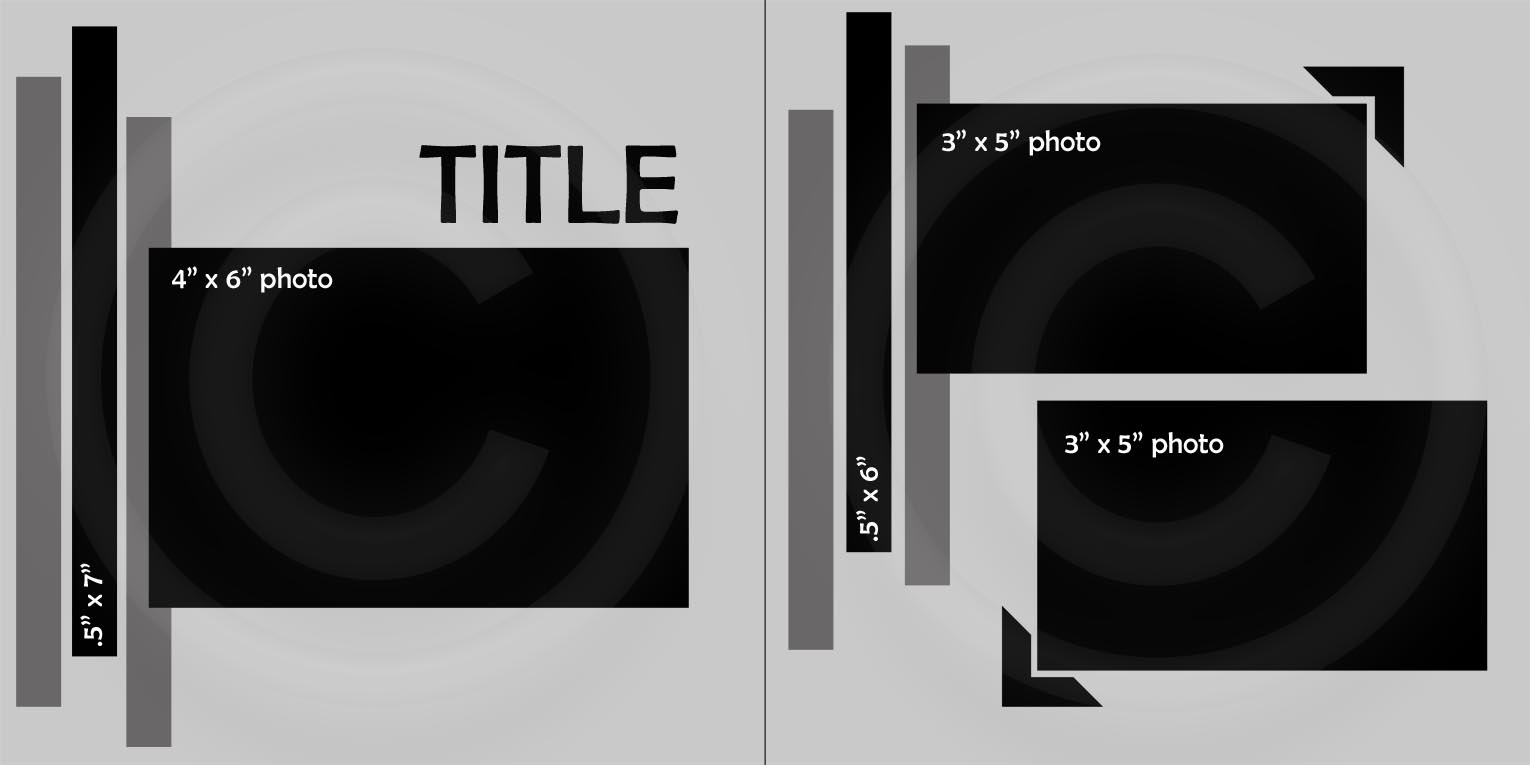
 Pages 6 and 7 - Gather up those precious pictures of Daddy with his “Little Angel” or “Little Man” and show them off on these two pages of your new baby scrapbook. You’ve got room for a 5” x 7” and two 3” x 5”.
  You can switch up the title based on whether or not your new bundle of joy is little girl or a little boy and…if you’ve rather use another format for your “Daddy” pictures, then you can use this for “Big Brother/Sister” pictures because they are important too and it is too cute to see your first born cradle their baby brother or sister.
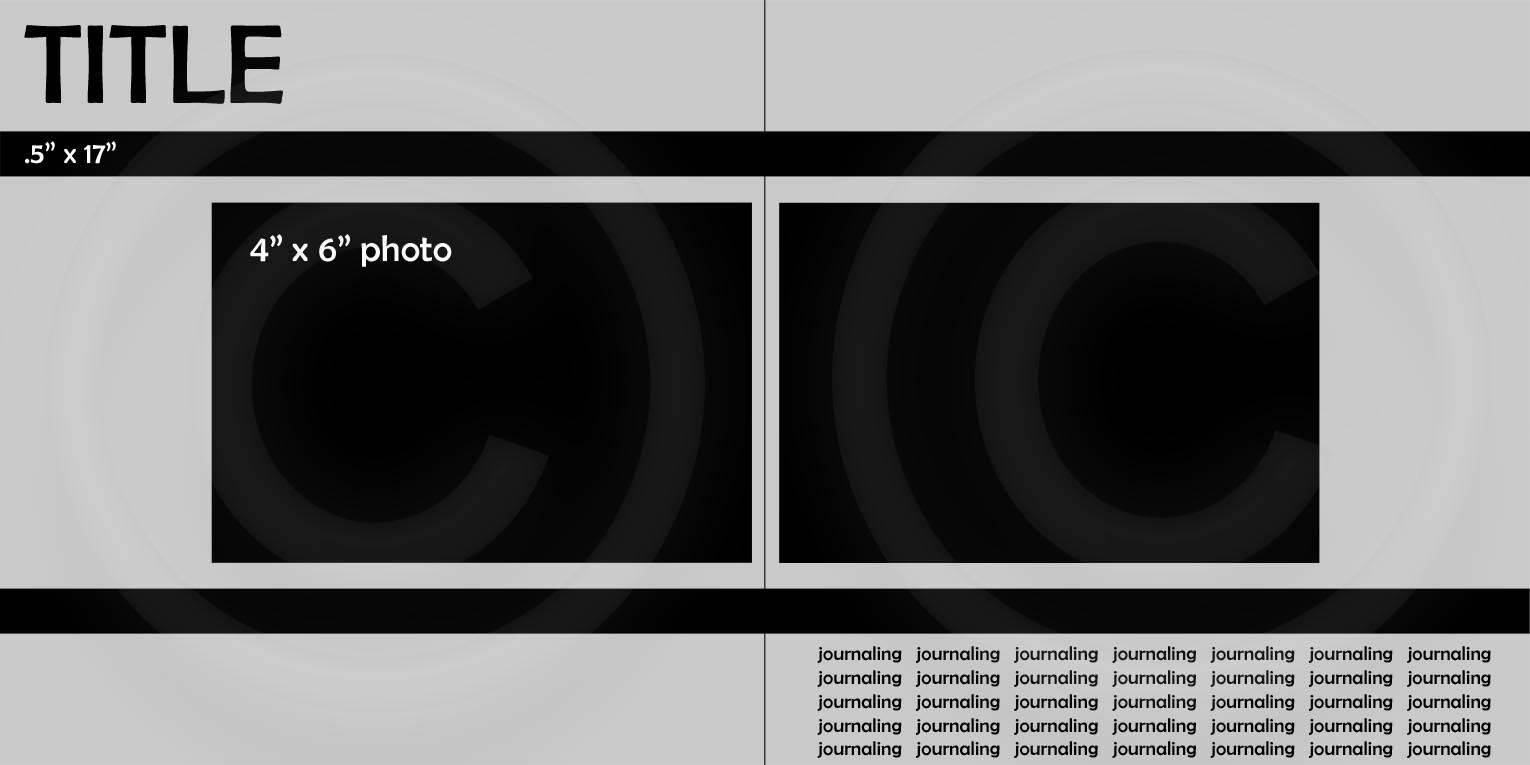
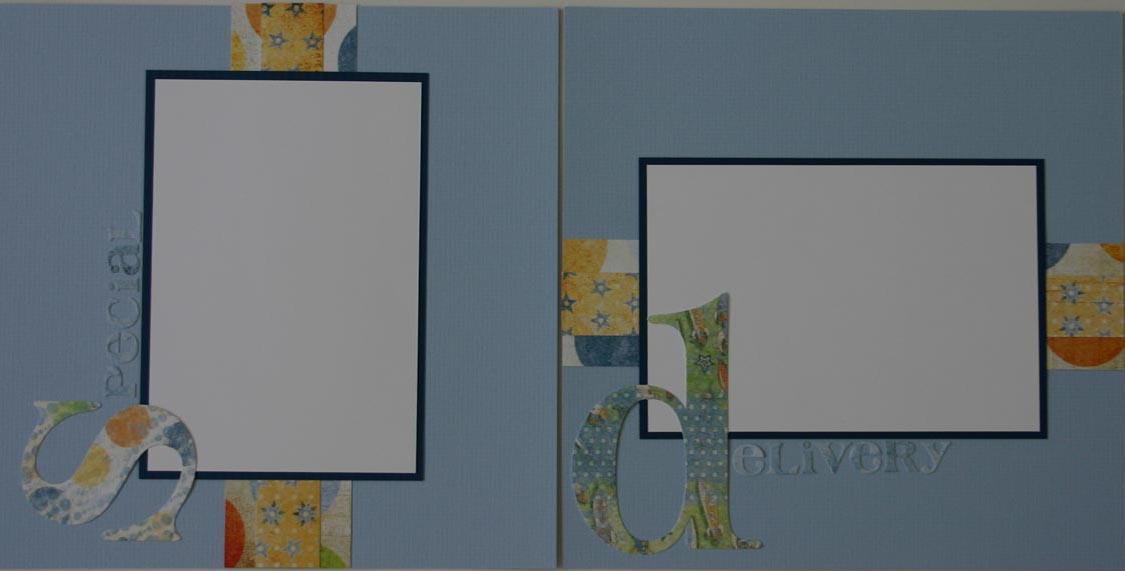
 Pages 8 and 9 – You’ve waited nine months for the stork to arrive with a “Special Delivery”, so find two of your favorite pictures (4" x 6") of your little one or two pictures from the hospital to fill in the next two pages of your new baby scrapbook. Of course, you can always use this layout for something completely different, like baby’s first bath, pictures with siblings, the trip home or baby’s first Christmas.
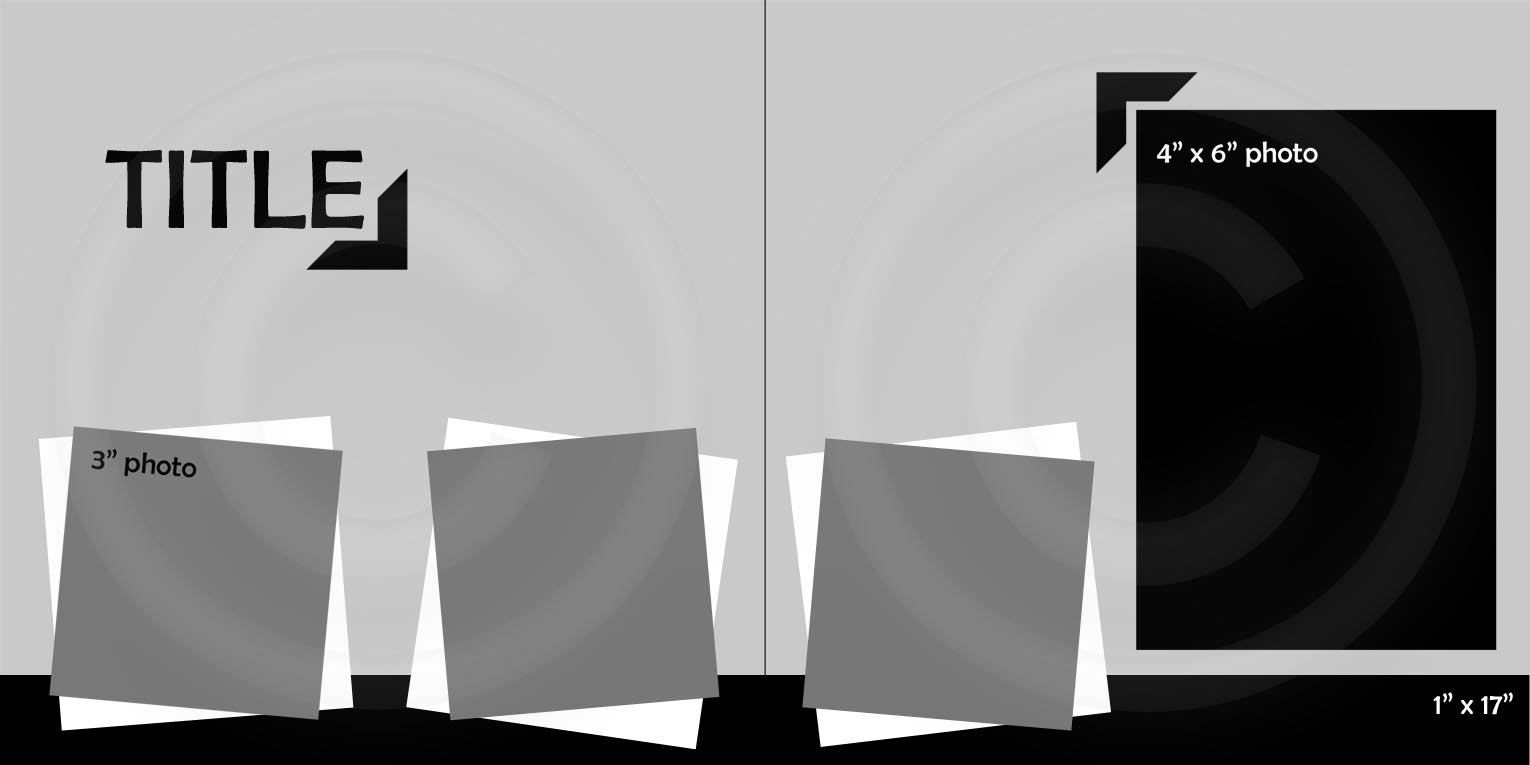 Pages 10 and 11 – The design of this layout is taken almost directly from (of all things) a birth announcement. I loved the design of my cousin’s announcement and thought it would make a great layout for a new baby scrapbook. Unlike “traditional” scrapbook layouts, where the focal picture is on left….this one is on the right. Now, while it may go counter to standard design criteria, it still maintains proper visual flow from left-to-right (those standard design criteria are more like guidelines anyway...). You can use store bought patterned paper for the one-inch strip that runs across the bottom of the page or you can make your own with your new baby’s birth information (click here for more information) and for a title, you can simply put your baby’s name in big chipboard letters.
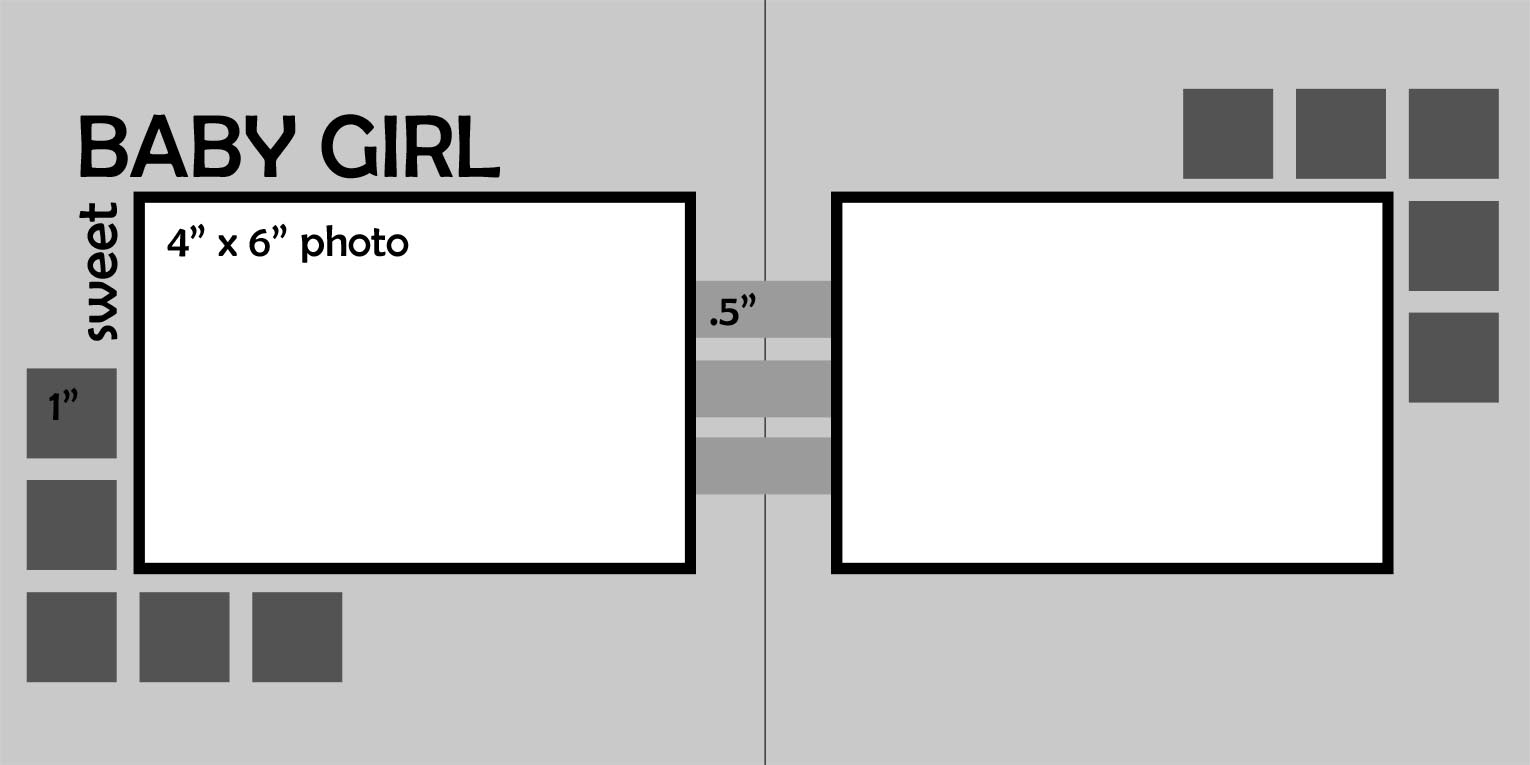 Pages 12 and 13 - So, we've had a page in your new baby scrapbook featuring Mom, Dad and even siblings, but what about Grandma and Grandpa?!! We can't forget about their first visit, especially if they travelled many miles to get there. And...just so there is equal "billing" among the two sets of grandparents....this layout features two 4" x 6" pictures. If you'd rather, you can use this layout for other "introduction" pictures, like your new son or daughter meeting their Aunts, Uncles, Cousins or family friends for the first time.
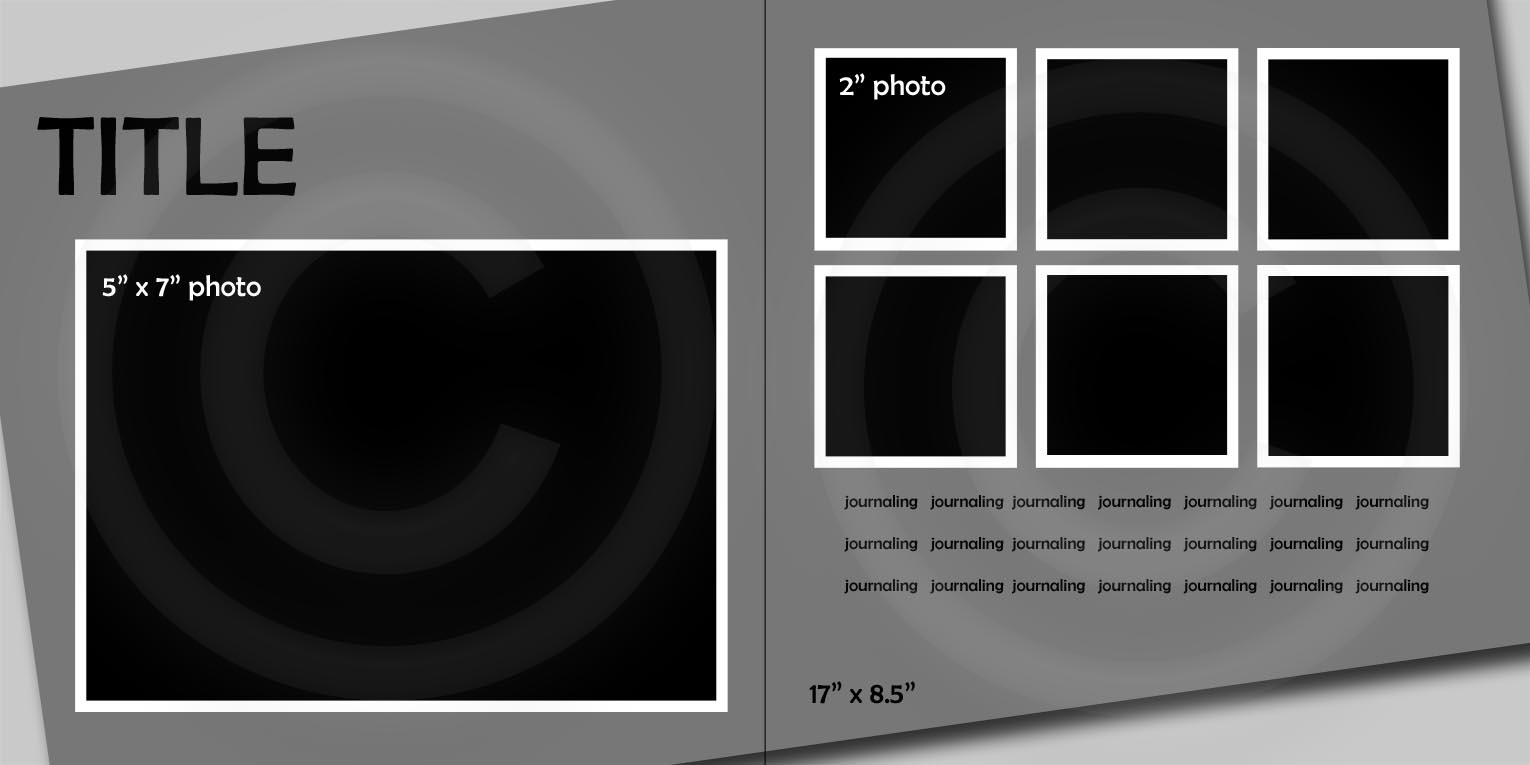
 Pages 14 and 15 - This new baby scrapbook layout is perfect for those pictures of tiny little toes (and hands) and big beautiful eyes....the macro/close-up shots. You can feature an "Anne Geddes" type shot on the left and then a variety of baby close-ups on the right. The background (tilted patterned paper) should be simple in order to not compete with the pictures.
Happy Scrapping!